Even though Tib Bar training is pretty straightforward in terms of biomechanics, we wanted to cover what this tibialis trainer has to offer, and how to use the tib bar for other exercises as well.
This injury-prevention tool is steadily gaining in popularity among science-based athletes, alongside its unilateral, younger, Solo Tib Bar variant. Also, it’s a piece of training equipment quite popular with the Knees-over-toes community.
So, what gives?
Table of Contents
What is a Tib Bar?
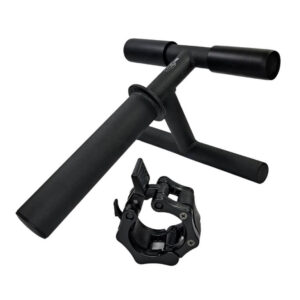
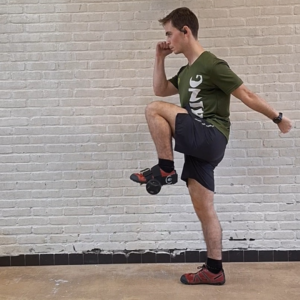
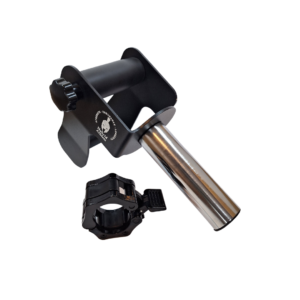
In short, a tib bar, aka tibialis trainer, aka shin trainer, is a simple, yet robust piece of exercising equipment made to train the tibialis anterior muscle. It’s designed of three main parts:
- A padded crossbar to hold and lock in the top part of your feet
- The loading bar that matches 50mm (2-inch) Olympic plates (up to 70kg)
- A rigid bar to help you lock in your feet from below
Tib bar training is designed to bulletproof your shins and ankles by directly targeting the plantar flexion foot muscles.
In simpler terms, the tib bar allows you to protect your knees by strengthening the muscles that support it from below. There are other forms of tibialis raises out there, but not as effective as tib bar training.
The Two Types of Tib Bar Training: Regular and Solo Tib Bar
The Tib Bar vs Solo Tib Bar training debate boils down to bilateral vs unilateral training.
On one hand (or foot rather), the regular tib bar allows you to put more load on both of your tibialis at the same time. Essentially, you always use it with both of your ankles, with a focus on the plantar flexion (pulling your feet.
With the Solo Tib bar, by loading your ankles individually, you get to train them in another plane (i.e. ankle rotation). Although, you won’t be able to load it as much as you would the regular tib bar version.
No matter the variant you choose, the main focus of tib bar training is loading your ankles for weighted plantar flexion. This, by extension, protects your ankles, shins, and knees from common athletic injuries.
How to Use a Tib Bar?
Tib bar training is pretty intuitive, and it’s pretty easy to master. Thanks to its build that firmly locks your feet, all you have to be mindful of is not overdoing it.
Here’s how to use the tib bar:
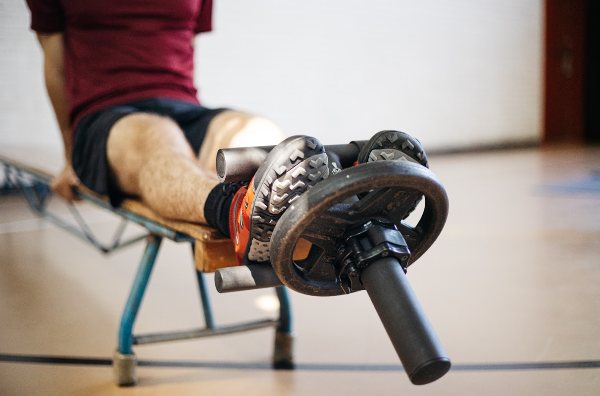
- Load the tib bar with 50mm plates and lock them with the provided clip. Start light, just enough so you can reach full ROM on the plantar flexion
- Sit on a bench with just your feet hanging over the edge
- Equip the tib bar by sliding your feet to the designated spots (under the padded crossbar) and let it weigh your feet down (dorsiflexion)
- Plantar flex your ankles by pulling your toes towards your shins. Control the weight and do not rush.
- Hold for a moment at the top position and release
- Repeat for 8-15 reps for at least two sets per session
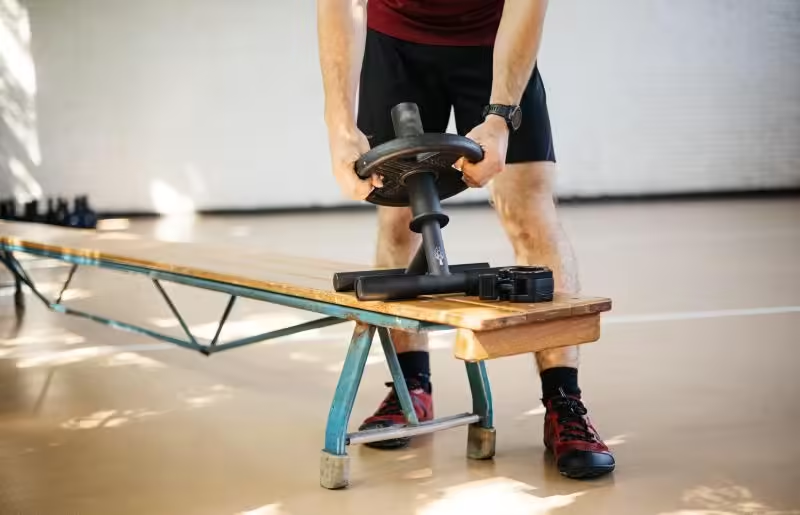
Tib Bar training besides targeting the tibialis anterior
With the standard Hybrid Athlete Tib Bar, you can do other exercises, besides tib raises. You can also do:
- Tib bar leg extensions
- Sumo squats
- Bench pullovers
- Wrist curls (yes, and it’s very effective)
If you are planning to get a tib bar for our home gym, why not maximize the gains you can get out of it? Read about how to do these in this Tib Bar Exercises guide.
Train Your Tibialis Anterior, Your Knees Will Thank You
Whether you’re into running, lifting, climbing, MMA, or OCR, you need to think about your knees, and the stress that’s exerted on them during training. As the largest joint of the human body, they deserve all the care we can give them.
And that’s exactly the goal of tib bar training – strengthen the knee-supporting structures so we can move well into our old age.
GET THE BEST INJURY-PREVENTION TRAINING EQUIPMENT:
GET THE BEST INJURY-PREVENTION TRAINING EQUIPMENT:
Above all, a storyteller. Then comes marketing, branding, writing music, powerlifting, and woodworking.
